 Fold the flap on the red line from point
"A" to point "B".
Fold the flap on the red line from point
"A" to point "B".Special instructions for steps
16 to 18.
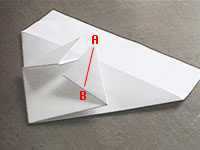
Fold the flap on the red line from point
"A" to point "B".
 This is the way the fold should look after
creasing. Notice that the crease does not continue beyond point "B".
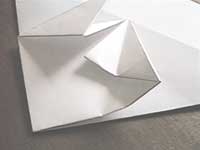
This is the way the fold should look after
creasing. Notice that the crease does not continue beyond point "B".
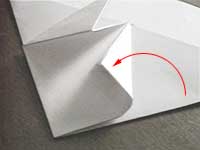 The red arrow shows how the flap is hinged.
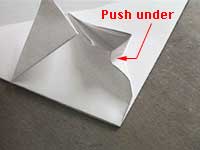
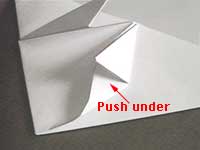 Tuck the paper under the flap just like
tucking a bedspread under a pillow.
Tuck the paper under the flap just like
tucking a bedspread under a pillow.
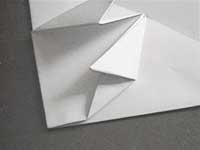
 This is another view of how to tuck the
paper under the flap.
This is another view of how to tuck the
paper under the flap.
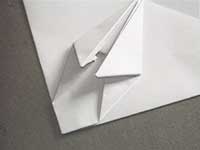
 If you end up with a fold like this, you
have done it correctly.
If you end up with a fold like this, you
have done it correctly.
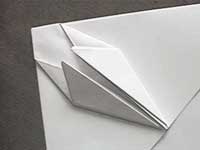
 This photo shows the same series of folds
on the other side.
This photo shows the same series of folds
on the other side.
 Another view showing the finished folds.
| Return to step 17
- 18 of assembly instructions |
All contents copyright © 1997,
Conceptos Digitales C.R., S.A. All rights reserved.
URL: http://www.zurqui.co.cr/ Revised: Jan. 31, 2012